Systems
The Systems page manages your target system inventory - the infrastructure that OrbisID scans for privileged accounts.
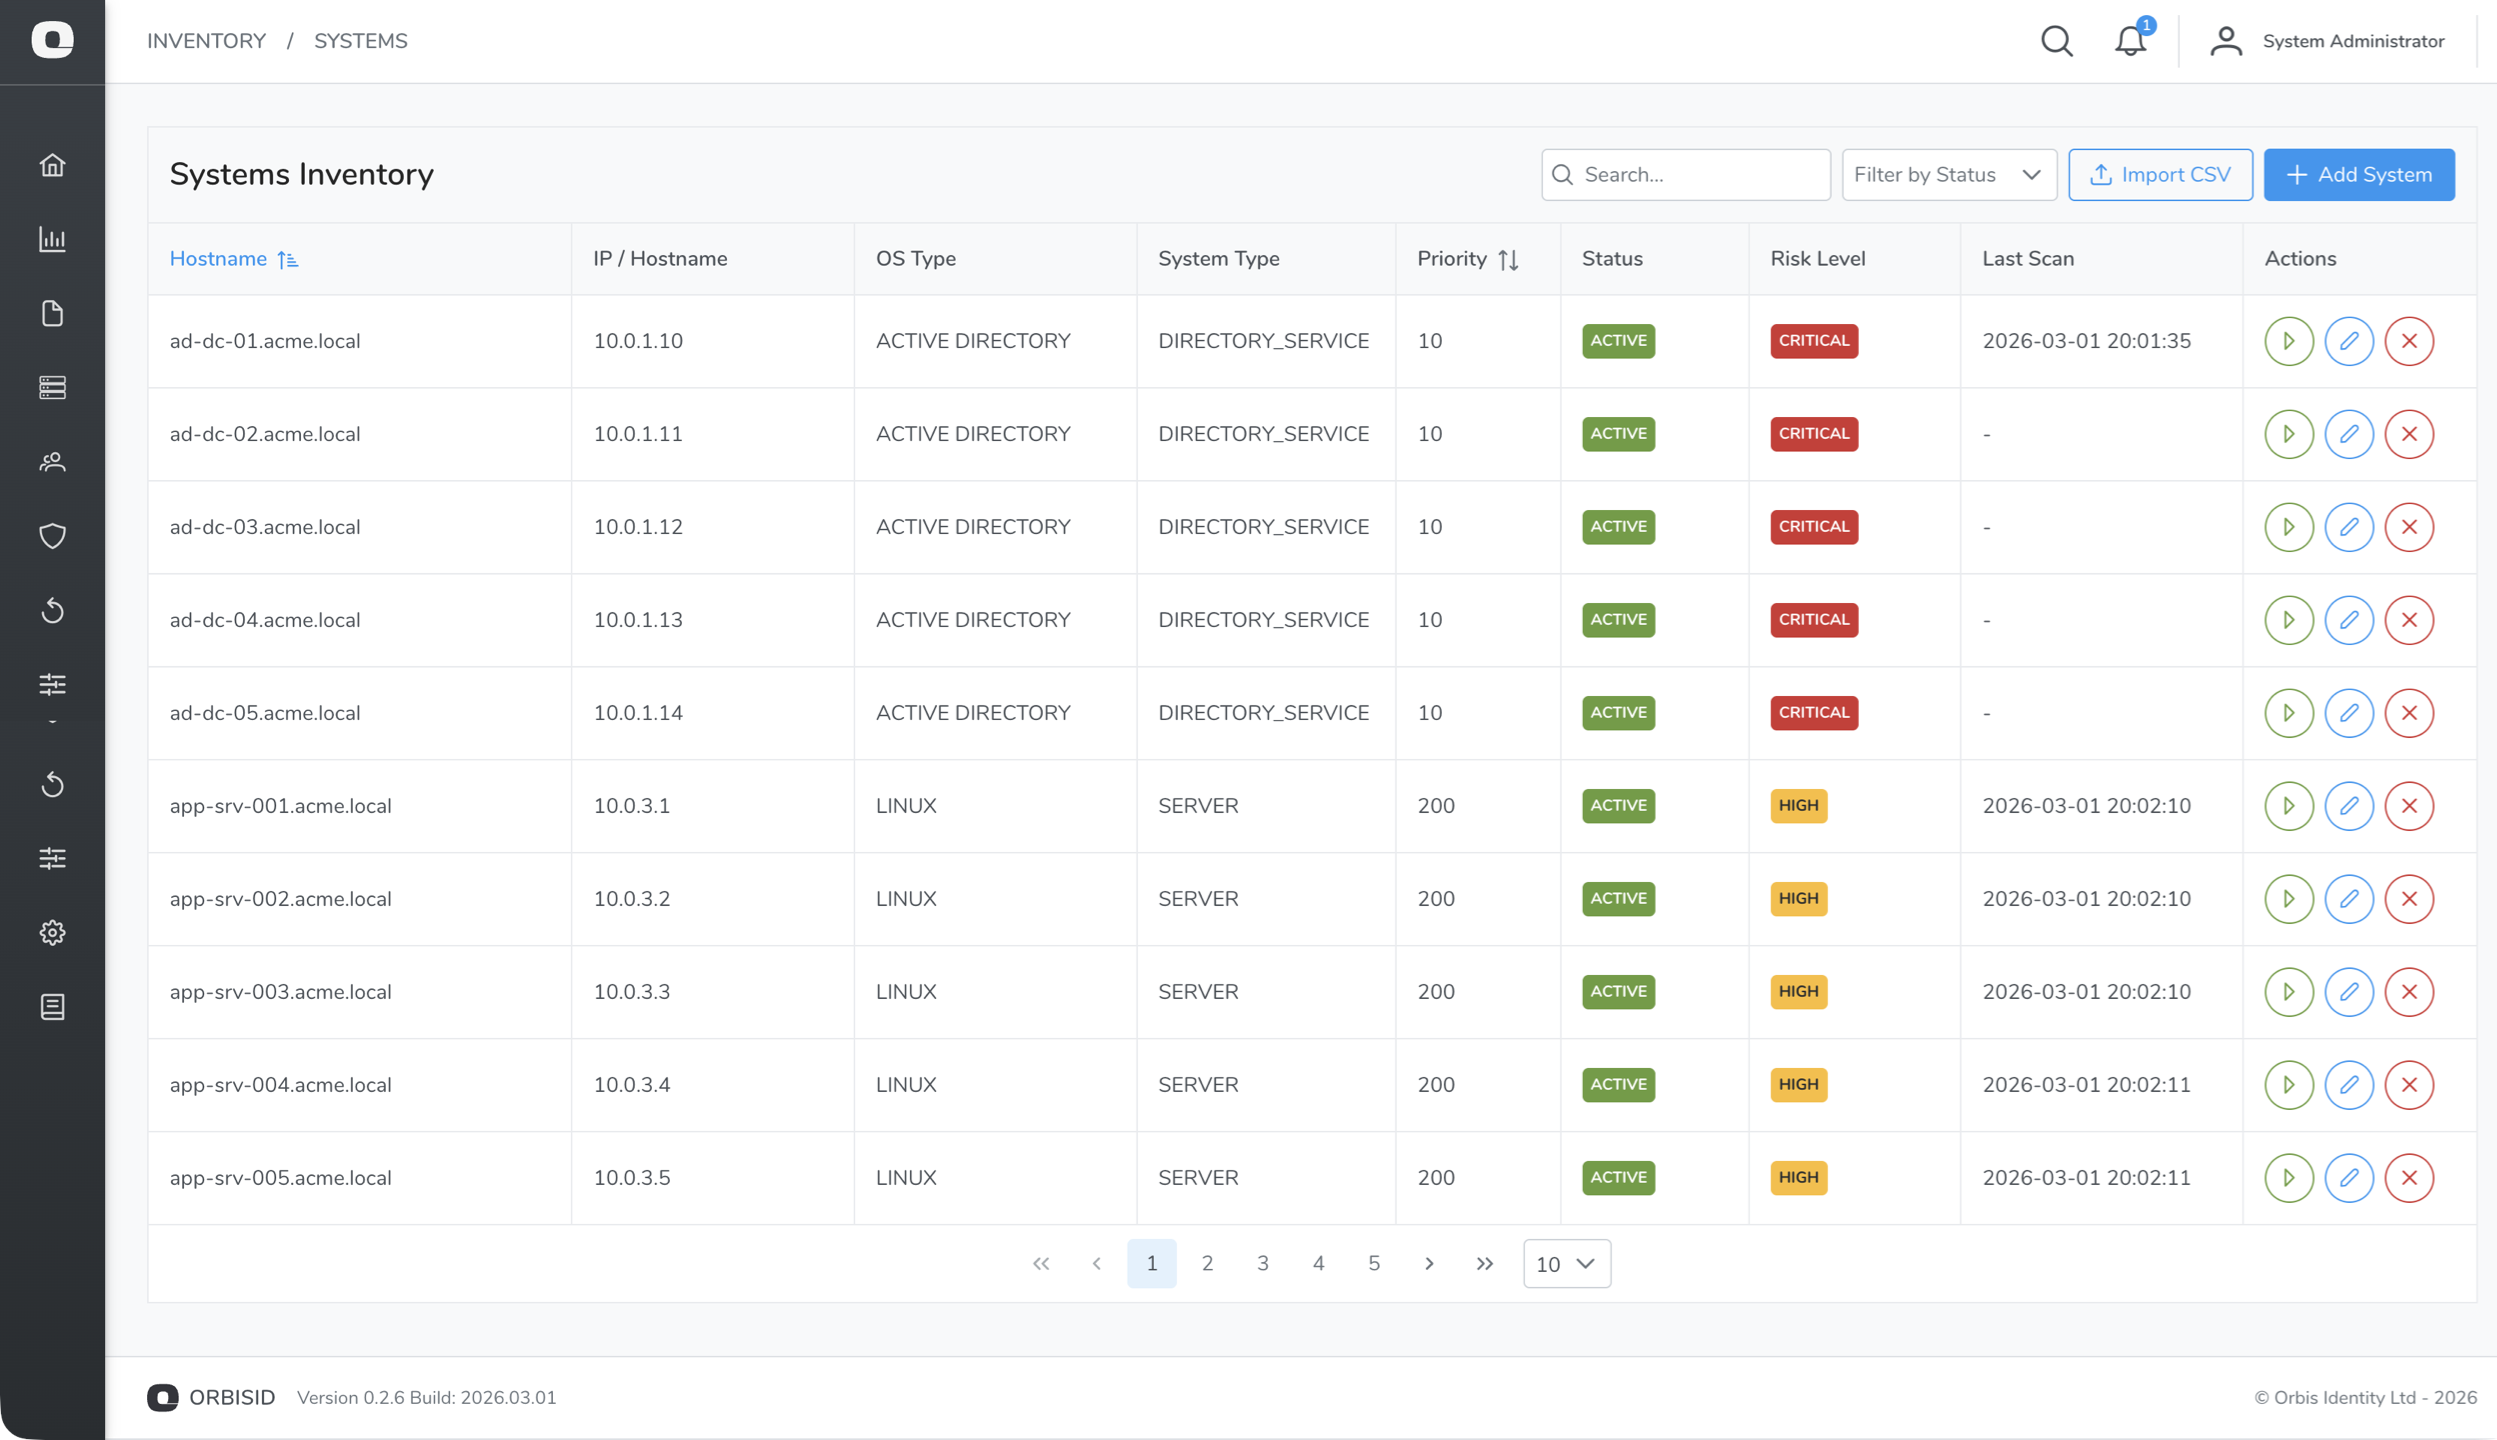
Viewing Systems
The systems table shows all registered systems with columns for:
- Name - display name for the system
- Hostname / IP - network address used for connections
- System Type - classification (Directory Service, Server, Infrastructure, etc.)
- OS Type - the scanning protocol used (Active Directory, Linux, SQL Server, etc.)
- Status - Active or Offboarded
- Last Scan - timestamp of the most recent successful scan
- Scan Priority - execution order within scan policies
Use the search bar and filters at the top to find specific systems.
Adding Systems
There are three ways to add target systems.
Manual Entry
- Click Add System
- Fill in the required fields:
| Field | Required | Description |
|---|---|---|
| Name | Yes | A descriptive name for the system |
| Hostname / IP | Yes | Network address OrbisID uses to connect |
| Port | No | Connection port (auto-filled based on OS type) |
| OS Type | Yes | Determines the scanning method (see below) |
| System Type | Yes | Classification category |
| Credential | Yes | The stored credential used to authenticate |
| Scan Priority | No | Execution order (lower = scanned first, -1 = excluded) |
- Click Test Connection to verify OrbisID can reach the system
- Click Save
If OrbisAI is enabled, a chat icon appears in the bottom-left corner while this dialog is open — it can explain what a field means, or interpret a connection-test failure if you click the Need help with this error? link that appears next to one. It never asks for or accepts credential values.
CSV Import
- Click Import CSV
- Download the CSV template for the correct column format
- Upload your populated CSV file
- Review the preview and confirm the import
Active Directory Discovery
- Click Discover from AD
- Enter your domain controller connection details
- Click Test Connection to verify
- Browse the directory and select systems to import
- Click Import Selected
Supported OS Types
Each OS type determines how OrbisID connects to and scans a system.
| OS Type | Protocol | Default Port | Edition |
|---|---|---|---|
| Active Directory | LDAP/LDAPS | 389/636 | Community+ |
| Linux | SSH | 22 | Community+ |
| Windows | WinRM | 5985 | Community+ |
| SQL Server | JDBC | 1433 | Pro+ |
| CSV | File import | - | Pro+ |
| CSV PAM | File import | - | Community+ |
| Custom Script | Script execution | - | Enterprise |
Active Directory
Scans domain controllers via LDAP to discover:
- User and computer accounts
- Group memberships and nesting
- Administrative group members (Domain Admins, Enterprise Admins, etc.)
- Service accounts
- Account status (enabled, disabled, locked)
LDAPS (port 636) is recommended for encrypted connections.
Linux
Connects via SSH to discover:
- Local user accounts (
/etc/passwd) - Group memberships (
/etc/group) - Sudo privileges (
/etc/sudoers,/etc/sudoers.d/) - Running services (systemd)
- Scheduled tasks (cron)
Requires a credential with sufficient privileges to read the files above (typically root or a user with sudo access).
Windows
Connects via WinRM to discover:
- Local user accounts
- Local groups and memberships, including members that belong to an external domain
- Windows services
- Scheduled tasks (optional, off by default)
Windows systems can be scanned directly by the OrbisID server, the same as Active Directory and Linux — no Scan Agent is required. As with any other connector, you can still route a Windows scan through an Agent Group if the target sits in a network segment the OrbisID server itself can't reach. See On-Premise Agent - Windows Scanning for connectivity prerequisites, including enabling WinRM on each target.
SQL Server
Connects via JDBC to discover:
- Server logins and roles (
sys.server_principals) - Role memberships (
sys.server_role_members) - Database-level permissions
When adding a SQL Server system, you must also specify the database name to connect to.
CSV
Imports account and entitlement data from a CSV file. Useful for systems that cannot be scanned directly. You configure:
- Source type - Network path or file upload
- Delimiter - Comma, semicolon, tab, or pipe
- Has header row - Whether the first row contains column names
- Data type - Which data the CSV contains (accounts, entitlements, identities)
- Column mappings - Map CSV columns to OrbisID fields
CSV PAM
Similar to CSV but specifically for importing PAM tool account data for reconciliation purposes.
Custom Script (Enterprise)
Runs a user-provided script to scan any system type. Scripts can be:
- Path mode - script is already present on the Scan Agent host
- Upload mode - script is uploaded to OrbisID and pushed to the agent at scan time
Scripts receive connection details as JSON on stdin and must output results as JSON on stdout. See On-Premise Agent - Custom Scripts for the full specification.
Scan Priority
Scan priority controls the order in which systems are scanned within a policy execution.
| Priority | Behaviour |
|---|---|
| Lower number | Scanned first |
| Higher number | Scanned later |
-1 | Excluded from scheduled scan policies (can still be scanned manually via "Scan Now") |
Default priorities by system type:
| System Type | Default Priority |
|---|---|
| Directory Service | 10 |
| Server | 200 |
| All others | 500 |
Directory Services are scanned first because they often provide identity context needed to link accounts discovered on other systems.
System Owner & Attestation
Each system can optionally be assigned a System Owner — the identity accountable for confirming which of the system's entitlements grant privileged access.
Assigning a System Owner
- Open the system and go to the General tab
- Select an identity from the System Owner dropdown — only active identities can be newly assigned (an owner who later becomes inactive is left in place rather than blocking unrelated edits)
- Click Save
Requiring Privileged Access Attestation
Once a System Owner is assigned, go to the Attestation tab to configure attestation for the system:
| Field | Description |
|---|---|
| Require Privileged Access Attestation | Enables periodic and on-demand attestation for this system. Requires a System Owner to be assigned. |
| Attestation Schedule | How often re-attestation is required: On-Demand Only, Quarterly, Semi-Annually, or Annually |
| Notify on new Entitlement | Sends a one-off attestation request scoped to just that entitlement whenever a new one is discovered during scanning |
If the System Owner is later removed, attestation is automatically disabled for that system.
See PAM Inventory > Privileged Access Attestation for how requests are sent, answered by the System Owner, and reviewed.
Auth Delegation (Shadow Directory Accounts)
Some accounts don't hold their own independent credential — a SQL Server Windows Login, or any account that authenticates via SSO/federation, shares its credential with an account on another system. OrbisID calls the account that shares a credential a Shadow Directory Account, and the account that actually holds the credential the auth account.
This is configured as an Auth Delegation Mapping Policy Rule (not on the system edit page) — see Policy Rules > Auth Delegation Mapping for how to set it up and how resolved mappings show up on the Accounts page.
Testing Connections
Click Test Connection on any system to verify OrbisID can reach it with the configured credential. The test:
- Establishes a connection using the system's protocol (LDAP, SSH, JDBC, REST API, etc.)
- Authenticates with the assigned credential
- Reports success or failure with diagnostic details
For Custom Script systems, the connection test runs the script with the --test flag. For Windows systems, the test is dispatched to the system's assigned Scan Agent (a direct test from OrbisID itself is not available — see Windows above). If any other system has an Agent Group assigned, its test is likewise dispatched to that agent instead of running from the OrbisID server — see On-Premise Agent - Connector Support for which connector types support this.
For cloud connectors that always talk to a fixed provider API endpoint rather than a customer-supplied host (AWS, GCP, Google Cloud IAM, Google Workspace), the Hostname / IP Address field is locked to that endpoint and isn't user-editable — the value shown is exactly what OrbisID connects to, so Test Connection reflects real reachability rather than an arbitrary address.
Offboarding Systems
Offboarding removes a system from the active scan scope without deleting its historical data.
- Select a system
- Click Offboard
- Confirm the action
Offboarded systems:
- Are excluded from all scan policies
- Retain their scan history, accounts, and entitlements
- Have all their accounts and entitlements moved to the Archived tab on the Accounts and Entitlements pages
- Can be re-onboarded later
To re-onboard, select the offboarded system and click Re-onboard.