PAM Inventory & Reconciliation
The PAM Inventory module manages your PAM tool's account inventory and reconciles it against the privileged accounts OrbisID discovers through scanning.
Requires Pro or Enterprise edition — not available on Community.
PAM Accounts
Navigate to PAM Inventory to manage PAM account records.
What is a PAM Account?
A PAM account is a record imported from your PAM tool (CyberArk, BeyondTrust, Delinea, etc.) that represents an account managed in that tool. OrbisID compares these records against its discovered accounts to find gaps.
Adding PAM Accounts
Manual Entry
- Click Add PAM Account
- Fill in the details:
| Field | Required | Description |
|---|---|---|
| Account Name | Yes | The account name as it appears in the PAM tool |
| PAM Tool | Yes | Which PAM solution manages this account |
| Safe / Container | No | The PAM tool's grouping (e.g., CyberArk Safe name) |
| System | No | The target system this PAM account is for |
| Status | Yes | Active, Disabled, or Pending |
- Click Save
CSV Import
- Click Import CSV
- Download the template for the correct column format
- Configure column mappings if your CSV has different column names
- Upload the file and review the preview
- Click Import
Live Scan (CyberArk, BeyondTrust, Bravura Privilege, Delinea, Senhasegura)
These five connectors can feed PAM Inventory directly from a live scan instead of a manual CSV import. On the Systems page, set the target system's System Type to PAM Platform and each scan will upsert PAM Account records automatically. Setting System Type to Application instead lists the same system's access on the normal Accounts and Entitlements pages — the two modes are mutually exclusive per system. All other PAM-classified connectors (Wallix Bastion, ARCON PAM, One Identity Safeguard, Teleport, HashiCorp Vault, Delinea Privilege Manager) always feed Accounts/Entitlements, since they scan console/admin users rather than vaulted credentials.
PAM Account Statistics
The statistics bar shows:
| Metric | Description |
|---|---|
| Total | All PAM account records |
| Active | Currently active in the PAM tool |
| Matched | Successfully matched to a discovered account |
| Unmatched | Not yet matched |
Reconciliation
Navigate to PAM Inventory > Reconciliation to compare your PAM inventory against discovered accounts.
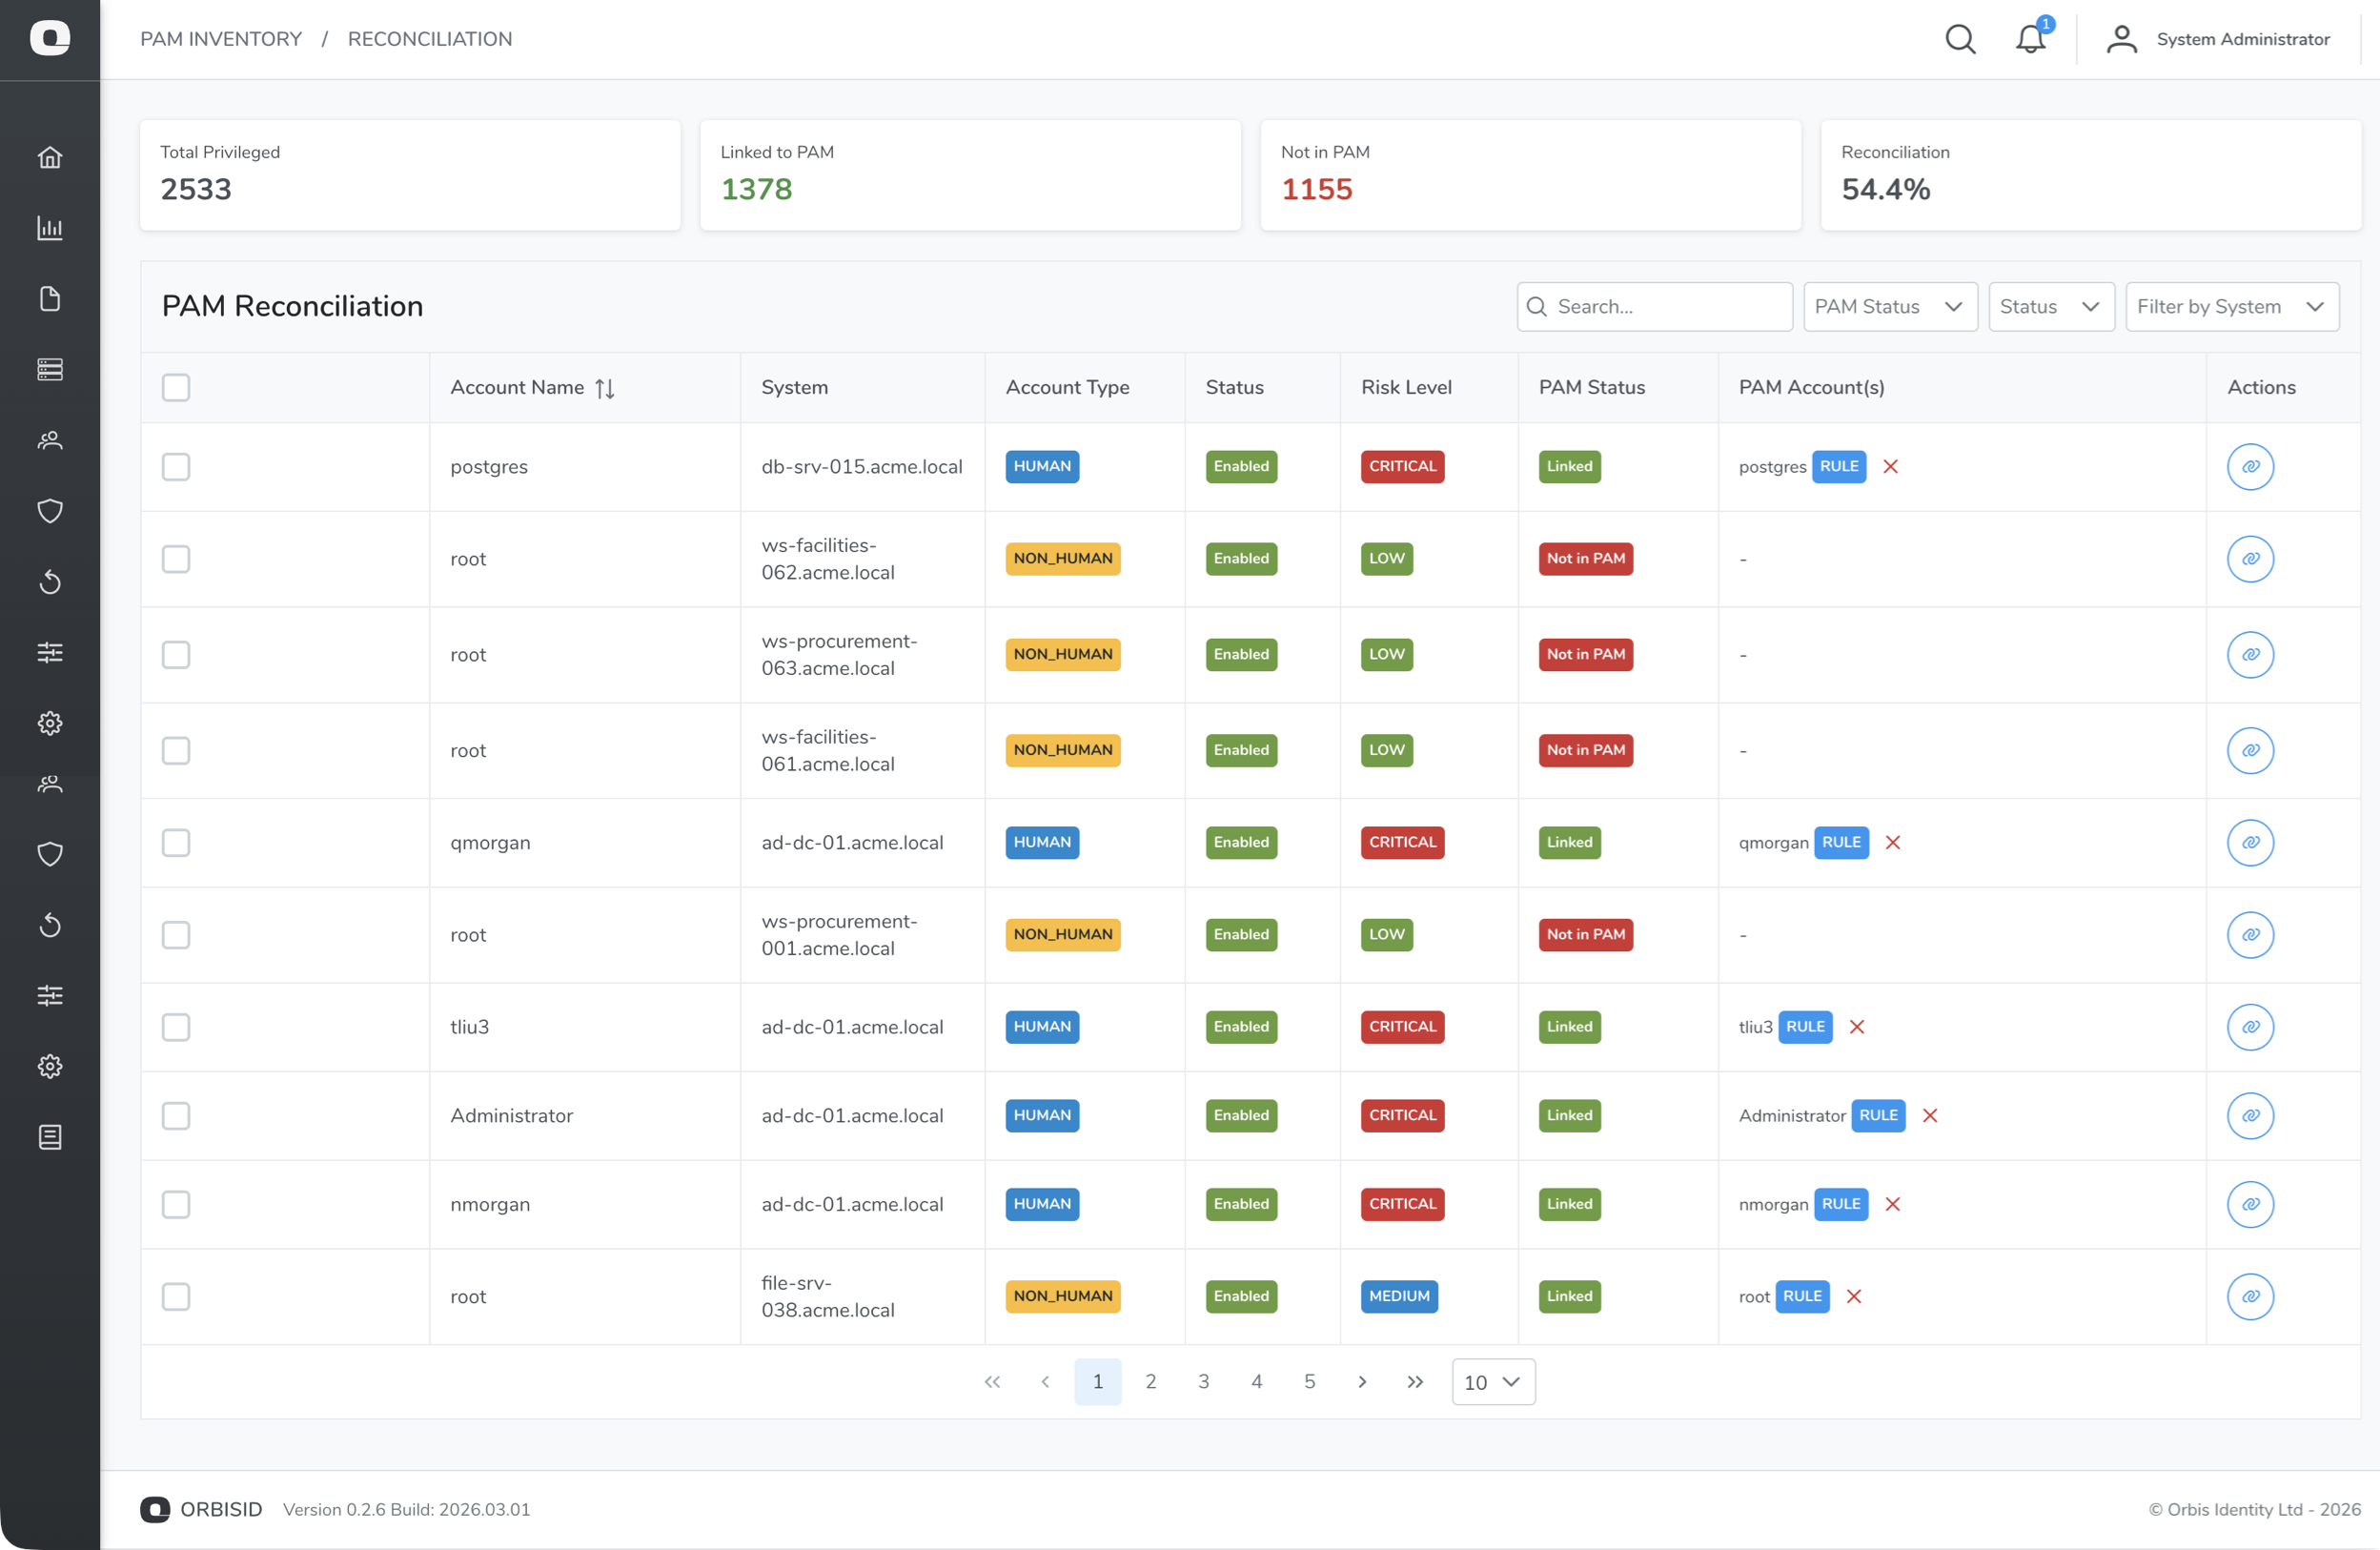
Running Reconciliation
- Click Run Reconciliation
- OrbisID compares every discovered privileged account against the PAM inventory
- Results are categorised into statuses (see below)
Reconciliation Statuses
| Status | Meaning | Action Required |
|---|---|---|
| Matched | The discovered account has a corresponding PAM account | None - account is managed |
| Unmanaged | The discovered account is privileged but has no PAM account | Onboard to PAM tool |
| PAM Only | The PAM account exists but no matching account was discovered | Investigate - may be stale |
| Excluded | Manually excluded from reconciliation | Review periodically |
Understanding the Results
Linking PAM Accounts
Sometimes a discovered account and a PAM account don't match automatically because of naming differences (e.g., DOMAIN\admin vs admin@domain.com). You can manually link them:
- Find an unmatched account
- Click Link
- Search for the corresponding PAM account
- Confirm the link
Bulk linking is also available for linking multiple accounts at once.
A ranked Suggested Matches list appears above the search box, each with a confidence score and reason (e.g. the PAM record's reported address matching the account's own system). This works even without OrbisAI enabled — AI only adds a second opinion on genuinely ambiguous matches. High/Critical PAM Risk Level accounts always require an extra explicit confirmation before linking, however confident the match.
For a hands-off alternative, a PAM Inventory Linking (AI Auto-Match) policy rule can link these automatically during a scan once its confidence threshold is met — see AI-Assisted PAM Inventory Linking. The same High/Critical exception applies there too, non-negotiable: those accounts are always left here for manual review.
Excluding Accounts
To exclude an account from reconciliation (e.g., a known exception):
- Select the account
- Click Exclude
Excluded accounts will not appear as "Unmanaged" in future reconciliation runs.
Privileged Access Attestation
Navigate to PAM Inventory > Attestations to have System Owners formally confirm which of their system's entitlements grant privileged access. A System Owner answers a short Yes/No questionnaire via a secure emailed link (no OrbisID login required), and their answers directly update each entitlement's Privileged flag.
How It Works
An attestation request can be triggered three ways:
| Trigger | Who / What | Scope |
|---|---|---|
| On-Demand | An Administrator or IAM Governance Manager selects systems and sends requests manually | All active entitlements on the system |
| Scheduled | An Attestation Reminder scan policy sweeps its assigned systems for due attestations (see Scanning > Policy Types) | All active entitlements on the system |
| New Entitlement | Fires automatically when a scan discovers a brand-new entitlement, if the system has Notify on new Entitlement enabled | Just the newly discovered entitlement |
A System Owner must be assigned to a system (see Systems > System Owner & Attestation) before any attestation can be sent, and periodic attestation must be explicitly enabled per system.
Global Configuration (Administrator)
Go to the Configuration tab (Administrator role required) to set organisation-wide attestation settings:
| Field | Description |
|---|---|
| Privileged Access Definition | Free-text explanation of what constitutes privileged access in your organisation. Shown to the System Owner at the start of every questionnaire. |
| Privileged Determination | Whether an entitlement is marked Privileged if the owner answers Yes to any question, or only if they answer Yes to all questions. |
| Link Expiry (days) | How many days an attestation link remains valid before it expires. |
| Attestation Questions | The Yes/No question bank asked for every entitlement on every questionnaire. Add, edit, reorder, or disable questions. A question that has already been answered on a submitted attestation cannot be deleted — disable it instead to preserve history. |
Sending On-Demand Requests
Administrators and IAM Governance Managers can trigger attestation outside the regular schedule:
- Go to the Review tab
- Select one or more systems (each must have a System Owner assigned)
- Click Send On-Demand Request
Reviewing Status
The Review tab lists every system with attestation enabled:
| Status | Meaning |
|---|---|
| Current | Attestation has been completed within the configured period |
| Due | Never completed, or the configured period has elapsed since the last completion |
| Awaiting Owner | A request has been sent and is still outstanding (not yet submitted or expired) |
| No Owner | Attestation is enabled but the system's owner has since been removed |
| Not Configured | Attestation is not enabled for this system |
Click a system row to open its full attestation history — every request ever sent, who it went to, when it was sent, when (or whether) it was submitted, and whether it has expired.
The System Owner's Experience
When a System Owner receives an attestation email, they follow the secure link (no login required) to a page that:
- Shows the organisation's Privileged Access Definition
- Lists every entitlement in scope, each with the configured Yes/No questions
- Requires answering every question for every entitlement before submitting
- Requires ticking a confirmation checkbox that the information provided is correct
On submit, each entitlement's Privileged flag is set according to the configured determination mode (any-yes or all-yes), and the change cascades to inherited entitlements the same way a manual privilege override does. A link can only be submitted once.